Camera mounting ideas for Sony EVI-D70

62 postsstarted by michaelfish 35,356 viewsoriginal topic

#1
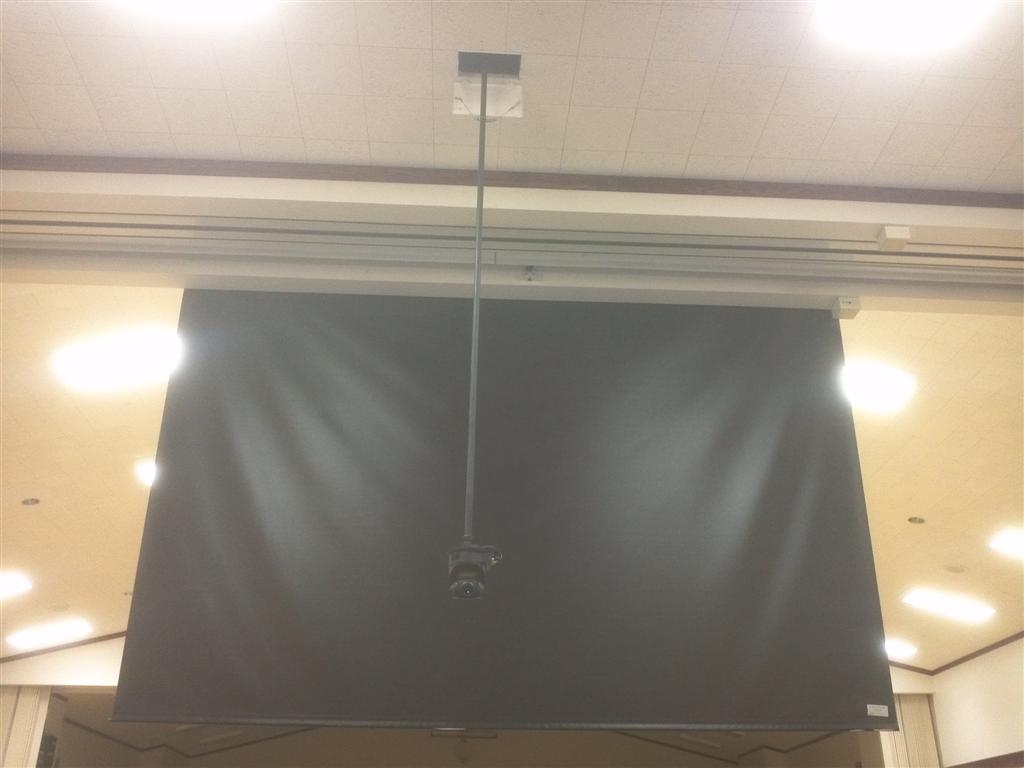
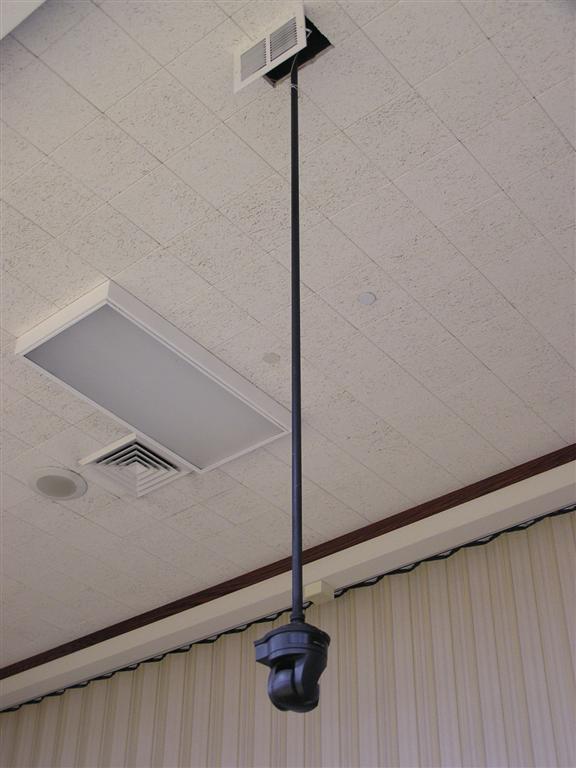
Here are some ideas for mounting the Sony EVI-D70 camera. If you have some good ideas, share yours.

Check out the PowerPoint show attached.
πŸ“Ž Camera Mounting Ideas.pps (809 KiB)
#2
That is very interesting, thank you. I've actually been actively searching for ideas and options on this, since we are building a new Stake Center (Lindsay & McDowell area FYI, since I notice you're local) and I am trying to arrange to rough in mounting platforms for a projector and camera during construction.

Are you involved or familiar with the different installations in your slide show? If so, I have a few questions on the slides:

Examples 1 & 2 (slides 1-7)- It's obvious that these extension arms would have to be installed and removed for conference, right? It would be kind of ugly and in-the-way for a permanent install. I would love to find a retractable extention like example #1 so it could be permanently installed. I've searched extensively and haven't found anything. Has anyone ever heard of a retractable camera extention mount? I've seen them that just pop out of the ceiling, but nothing that will drop several feet.

Slide 5- Why two cameras set up in the same location? Seems like for a two camera shoot, you would want different camera angles.

Example 3 (slides 8-9)- Same as above: Why dual cameras in same location? I'm going to have a hard enough time talking the stake into buying one camera for the new building!

In our old stake center here in Mesa, we have a pretty slick setup. There are two rear screens, one on each side of the overflow, and we have drop-down projector lifts on each side. The camera is mounted on one of the lifts, so we get a pretty good camera angle when the lift is down.

I'm not sure exactly how they got that whole thing approved (they were installed before my time), and I'm quite certain we won't be able to get this sort of installation approved for our new stake center, which is why I'm exploring other options.

Thanks for the ideas.
#3
SBankhead wrote:Examples 1 & 2 (slides 1-7)- It's obvious that these extension arms would have to be installed and removed for conference, right? It would be kind of ugly and in-the-way for a permanent install.

The extensions and cameras are removed after the conference which requires a ladder, but it isn't difficult since all of the cables are already run. The whole setup takes only 3 or 4 minutes to get the ladder and install or remove each camera.
SBankhead wrote:Slide 5- Why two cameras set up in the same location? Seems like for a two camera shoot, you would want different camera angles.

Example 3 (slides 8-9)- Same as above: Why dual cameras in same location?

We actually used 4 cameras. 2 on the left side, 1 hanging in the center and 1 suspended on the right. There were several reasons for multiple cameras:

1) This was the first time the robotic cameras were used and although we went through extensive testing, we wanted to be sure we could switch back to the original system, in case of a failure.

2) Our Stake was being reorganized during this Stake Conference and we thought it was nice to have the ablility to quickly pan to the new Stake President when he stood up in the congregation to be recognized. It would be difficult to attempt this with the robotic cameras, but with this set-up, we were able to have one camera on the pulpit, have a wide shot of the chapel, have a wide shot of the cultural hall and still have the tripod camera free to compose a close-up of the new Stake President the instant he stood up.

3) Two other Ward buildings receive the conference broadcast. We would like for them to feel as much a part of the Stake Center's congregation and Spirit as possible. It is the goal of the STC to deliver the word of the Lord to the other Wards in such a way as to invite the Spirit the best we can. We feel that the professionalism of multi-camera broadcast with different camera angles helps convey the Spirit better and helps to keep our remote congregations connected and interested.

4) Robotic cameras are most effective presetting and memorizing 6 positions for instant recall and making slight adjustments to frame the shot. In contrast, the camera operator of the tripod mounted camera is able to deliver extremely slow and deliberate pans of the choir and frame shots almost instantly where as it takes much longer to frame (compose) a shot with the robotic cameras. We're still getting used to the joystick controller for the robotic cameras.

5) Since our Stake Center is designed with the stage at the opposite end of the chapel, we can use the mulit-camera set up for both Stake Conference and performances on the stage. Setting up the extra cameras seemed 'a given' since it was not much additional work.

Eventually, we hope to eliminate the tripod camera. It takes up space (9 chairs), is visually distracting and it takes more time to set up - dragging out the platforms, running cables, setting up the tripod and camera, etc. We need experience operating the joystick controller, mixing with the SEG, chroma-keying the hymns, adjusting the sound, etc. If anything, we've learned this can't be done by one person - it requires a dedicated and supportive team. THANK YOU STC!
#4
SBankhead wrote:In our old stake center here in Mesa, we have a pretty slick setup. There are two rear screens, one on each side of the overflow, and we have drop-down projector lifts on each side. The camera is mounted on one of the lifts, so we get a pretty good camera angle when the lift is down.

I'm trying to visualize the drop-down projector lifts. Could you upload a picture of this set up so I can see what you're referring to? How are the power and video cables run? What about positioning the camera? I'm also working on a retractable camera system and would like ideas too.
Community Administrator
#5
michaelfish wrote:I'm trying to visualize the drop-down projector lifts.
I don't know michaelfish's setup, but a quick Google turned up this ad that I think illustrates how they work.

This one isn't cheap. Hopefully someone knows of a less expensive source.
Have you searched the Help Center? Try doing a Google search and adding "site:churchofjesuschrist.org/help" to the search criteria.

So we can better help you, please edit your Profile to include your general location.
#6
RussellHltn wrote:I don't know michaelfish's setup, but a quick Google turned up this ad that I think illustrates how they work.

This one isn't cheap. Hopefully someone knows of a less expensive source.

Yes, that's the type of lift I am referring to, although this is a more custom installation. I'll try to snap a few pictures next time I'm over there. Yes they are very expensive, and our installation required a fairly extensive rough-in to create "boxes" for the lifts to retract into (since it is a vaulted ceiling). As I mentioned, I'm not sure how they pulled off the budget, but it's very cool! (Actually, I do have some idea, but it would take some long explanation- maybe in another post). I seriously doubt I'll be able to get this approved for another building.

Since the lifts are pre-set to lower to the exact position every time, the projector framing is always the same, and the wiring is permanent, so all we have to do is lower the lifts, turn on the camera and projectors, and we're ready to go. The control is all with the IR remotes.
#7
A couple more questions for you on this:

1. In the first installation with the long drop from the ceiling in the center- Do you get any unwanted vibration or movement because of the long extention arm? This camera can be a little bit quick and jerky with the panning if the operator is not careful. I'm wondering if the torque from the panning can cause some sway in the extention arm.

2. I'm curious about how people are controlling these in different situations. Are you using IR extenders? Or are you using the serial control?
#8
[quote="SBankhead"]1. In the first installation with the long drop from the ceiling in the center- Do you get any unwanted vibration or movement because of the long extension arm? This camera can be a little bit quick and jerky with the panning if the operator is not careful. I'm wondering if the torque from the panning can cause some sway in the extension arm.[/quote]For the camera pole hanging from the ceiling (suspended 7’), I used 3/4" EMT with a locknut fitting at the top (hides the wires and it is easy to remove for disassembly after conference) and a permanently attached compression connector at the bottom (I added a screw for safety). The setup is surprisingly stable. Only erratic panning movement makes the pole sway slightly, but it is not noticeable to the average viewer (if you look for it, you'll notice it). The camera settles after a few seconds. The camera mount does not move with normal movements.

Note: The camera is located 75' from the pulpit so even with a rock-solid mount, at extreme zoom, adjustments to nudge pan/tilt/zoom is VERY touchy.

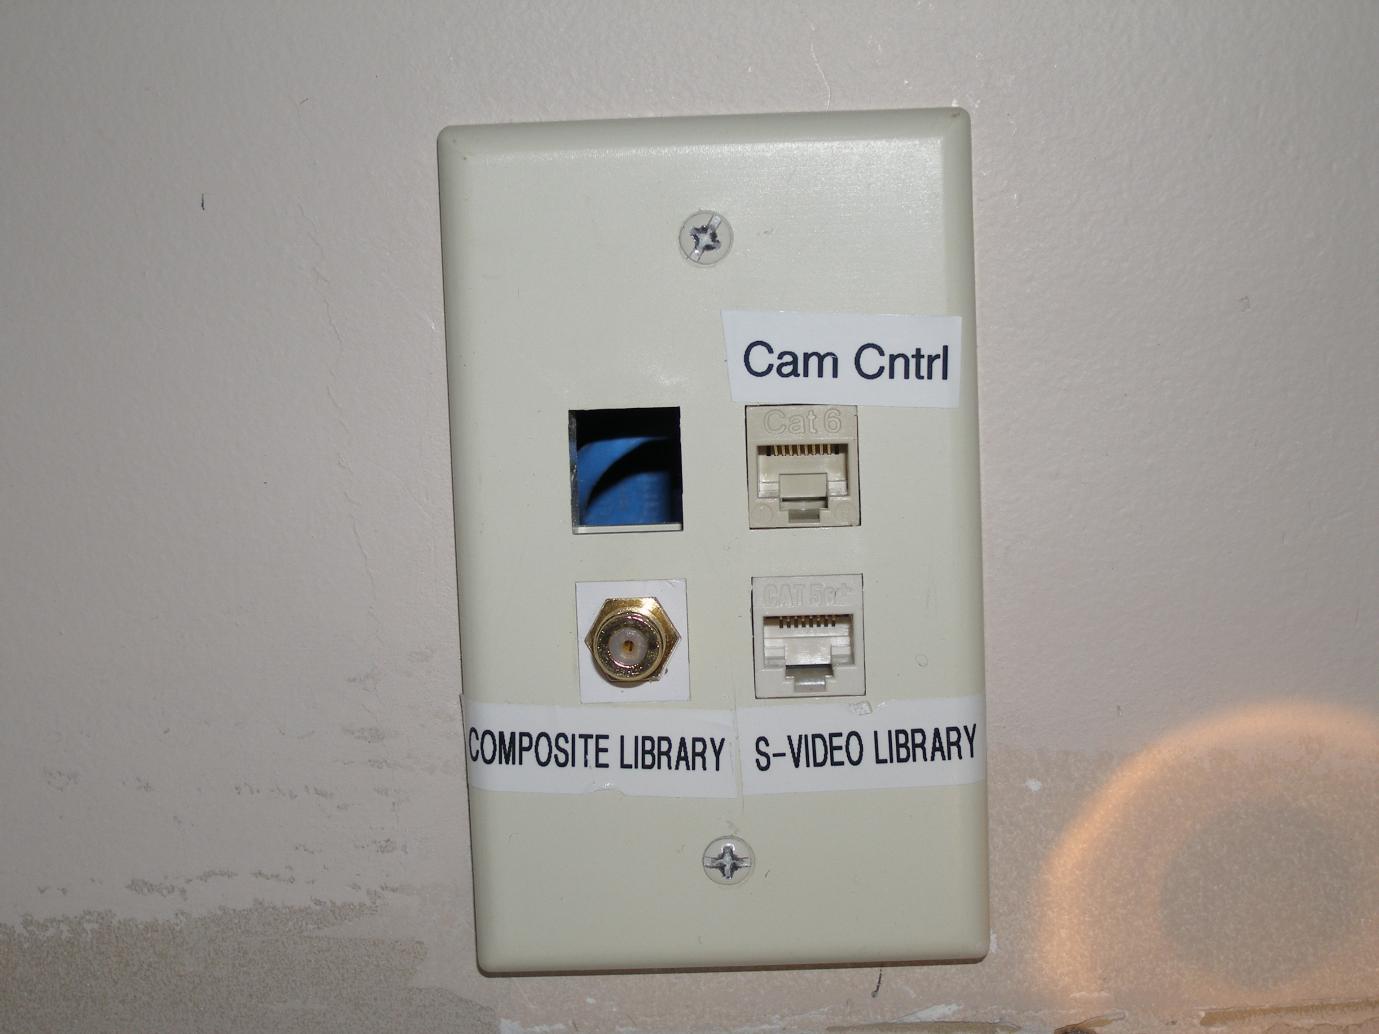
[quote="SBankhead"]2. I'm curious about how people are controlling these in different situations. Are you using IR extenders? Or are you using the serial control?[/quote]We have our controls located 150' away in the library (where the satellite and distribution equipment is located). The cameras are controlled with a Sony RM-BR300 ($850) which uses RS-422 over CAT5.

If you do cannot use a joystick to control the EVI-DI70 camera, I recommend using only the camera’s 6 presets - with wide, forgiving shots. Minor camera adjustments with I/R remote or software is tedious and distracting.

Adding a second camera with a wide shot would allow the camera composition (framing) to β€˜fine tuned’ before cutting to the close-up.
#9

An idea for motorized retractable camera

OK, here's my idea for an inexpensive, motorized, retractable camera system:

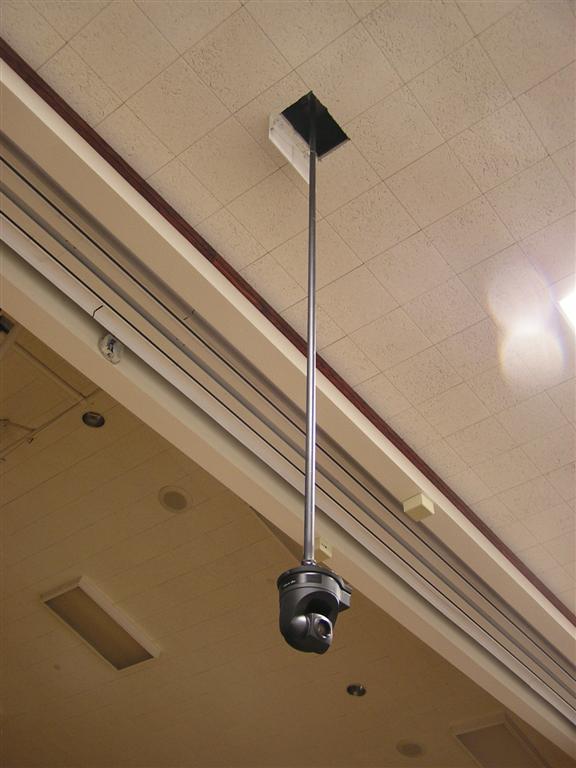
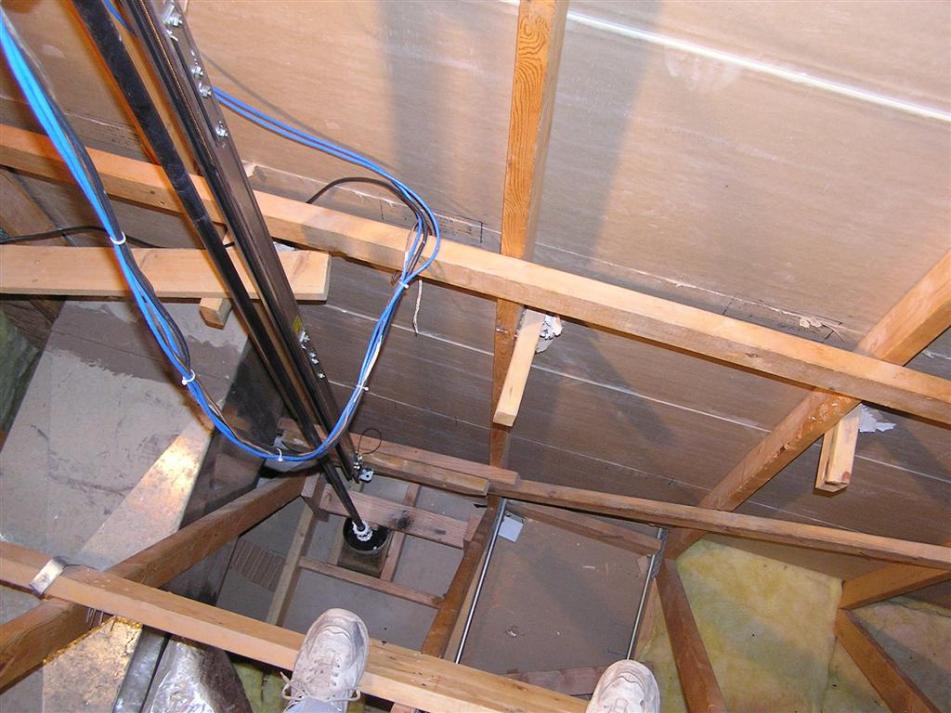
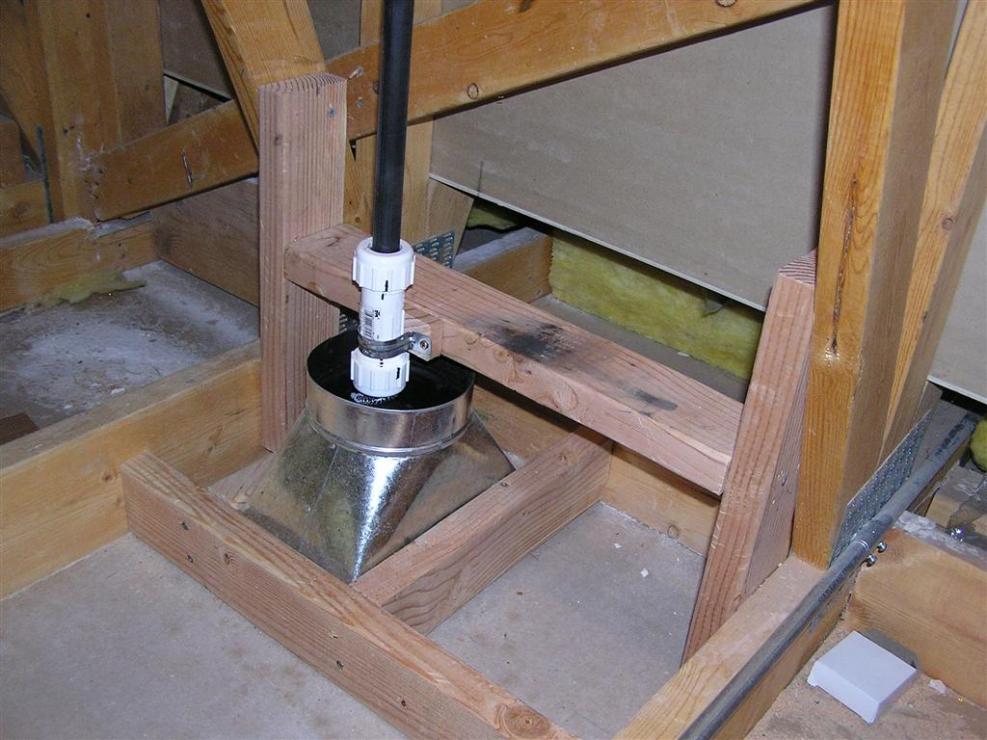
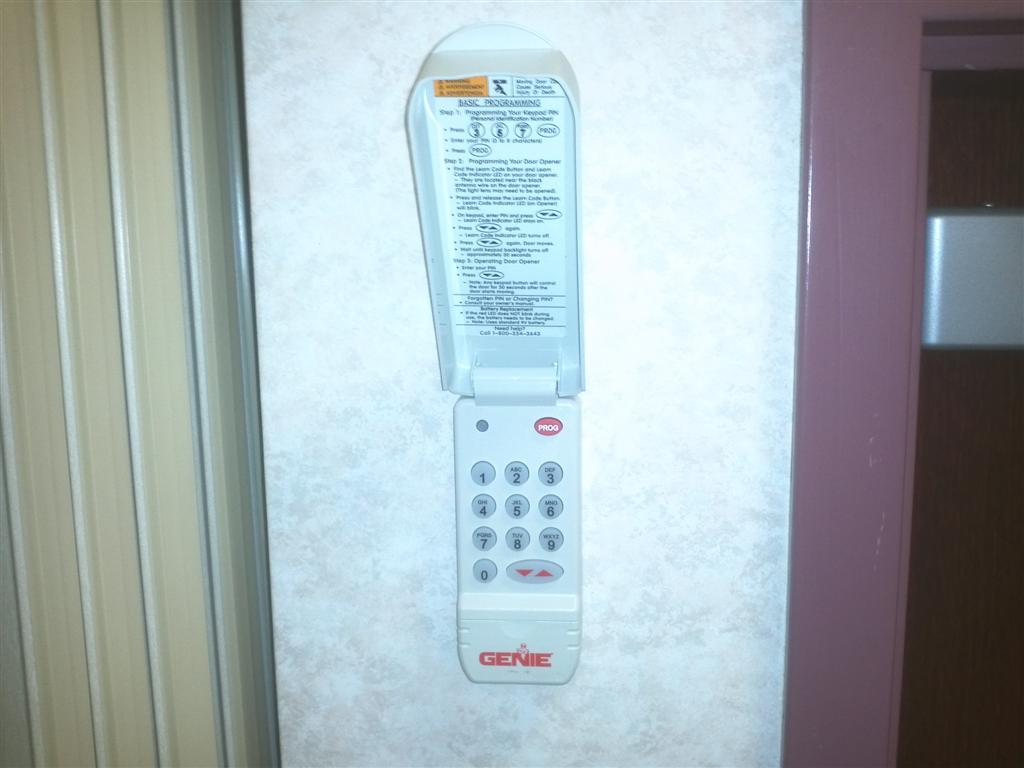
Install a new recessed lighting fixture (housing only) in the ceiling where the camera needs to drop out of the ceiling. The camera (EVI-D70) would be attached the same way as shown in the PowerPoint (first in this post) with a 4-square electrical box supporting the camera and by a 10’ long length of 3/4" conduit (with the wires run inside). The camera and pole would be concealed inside the recessed light fixture, with the pole extending into the attic through the top of the light fixture and through a bushing. The top of the pole would be secured to a motorized garage door opener mounted in the attic to the trusses and ceiling joists vertically, instead of horizontally. The garage door limits would be set to stop at designated positions and controlled with the wall mounted 10-key pad with the proper code or even wireless remote control.

Activating the wall-mounted remote control with the proper 4-digit code would lower the camera into place and automatically stop at the designated height. Retracting the camera would be done the same way but the camera would retract into the light fixture housing in the ceiling and come to rest in its safe concealed lighting fixture as determined by the limits set into the motorized garage door.

Our Stake needs for the camera to lower 7’ out of the ceiling for the best camera angle. Since garage door openers typically have 8’ of travel, and they are designed to operate in the harsh environment of an attic, this seems like a viable solution. I’ve been in the attic and found there is 14’ vertically above the area I need to mount the camera and proper supports of framing, trusses and ceiling joists. I believe I can purchase all that is necessary to complete the project for less than $400.

I’m just wondering what kind of problems may be associated with mounting the garage door opener vertically instead of horizontally.

What do you think of this idea? What kind of problems can you foresee?

Also, I'm still trying to think of a way that I can create a cover over the recessed light housing that covers the hole when the camera retracts...perhaps you can make some suggestions.
Community Moderators
#10
michaelfish wrote:OK, here's my idea for an inexpensive, motorized, retractable camera system:
Pretty nifty!
michaelfish wrote:I’m just wondering what kind of problems may be associated with mounting the garage door opener vertically instead of horizontally.
Most motors and drive mechanisms (chain, track, or screw drive) don't care how they are mounted, as long as they are well secured.
michaelfish wrote:What do you think of this idea? What kind of problems can you foresee?
I would throw a safety chain/strap to the part being lowered, just in case something broke loose.
michaelfish wrote:Also, I'm still trying to think of a way that I can create a cover over the recessed light housing that covers the hole when the camera retracts...perhaps you can make some suggestions.
The easiest way would be to mount a piece of matching ceiling material to the bottom of your platform being lowered, so when closed, it fits somewhat flush with the surrounding ceiling. You can even trim the piece with some molding if you want to hide the edges.
So we can better help you, please edit your Profile to include your general location.
Community Administrator
#11
michaelfish wrote: What do you think of this idea? What kind of problems can you foresee?
My concern would be stability. Both rotational and sway. Especially as you try to move the camera.
Have you searched the Help Center? Try doing a Google search and adding "site:churchofjesuschrist.org/help" to the search criteria.

So we can better help you, please edit your Profile to include your general location.
#12

Retractable Motorized Camera

Well, here's my idea of a garage door opener implemented as a concealed, motorized retractable camera system.

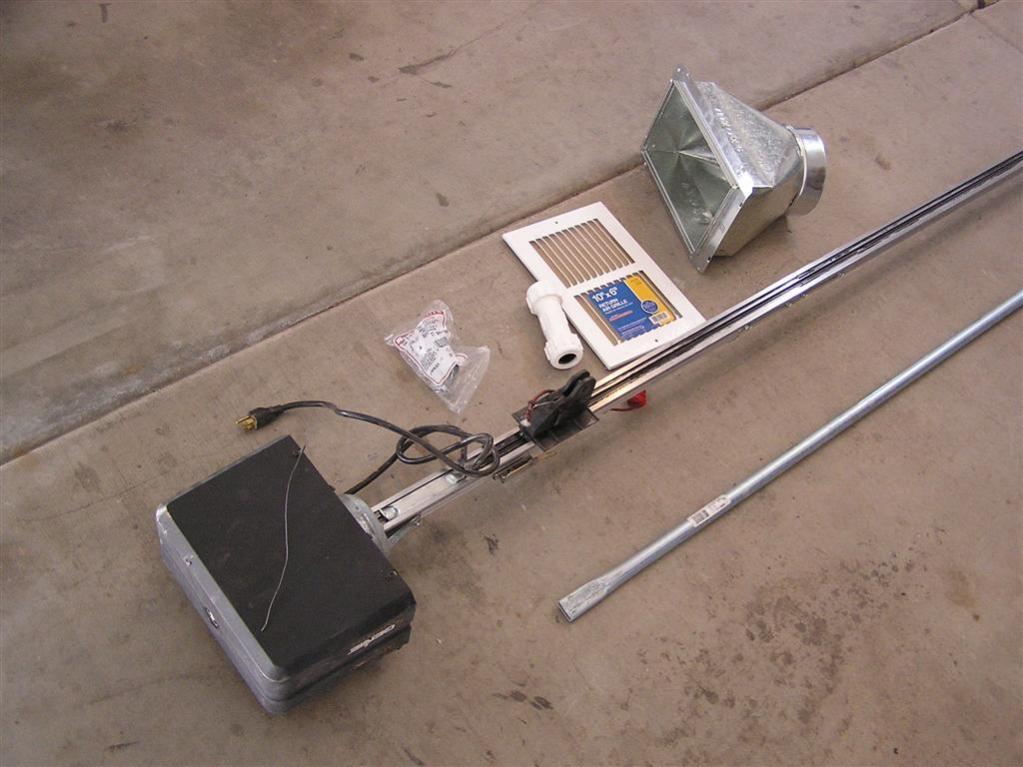
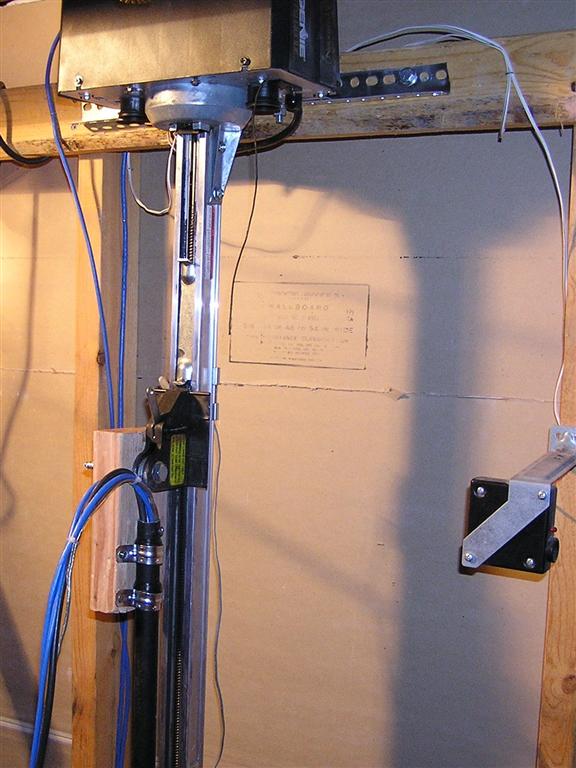
Using a garage door opener (track) mounted vertically instead of horizontally, I was able to install a motorized retractable camera system for the Sony EVI-D70.

The camera is raised/lowered by either the hand remote control or from a keypad mounted on the wall. Pan/Tilt/Zoom is accomplished via a Sony RM-B300 joystick controller located in the library.

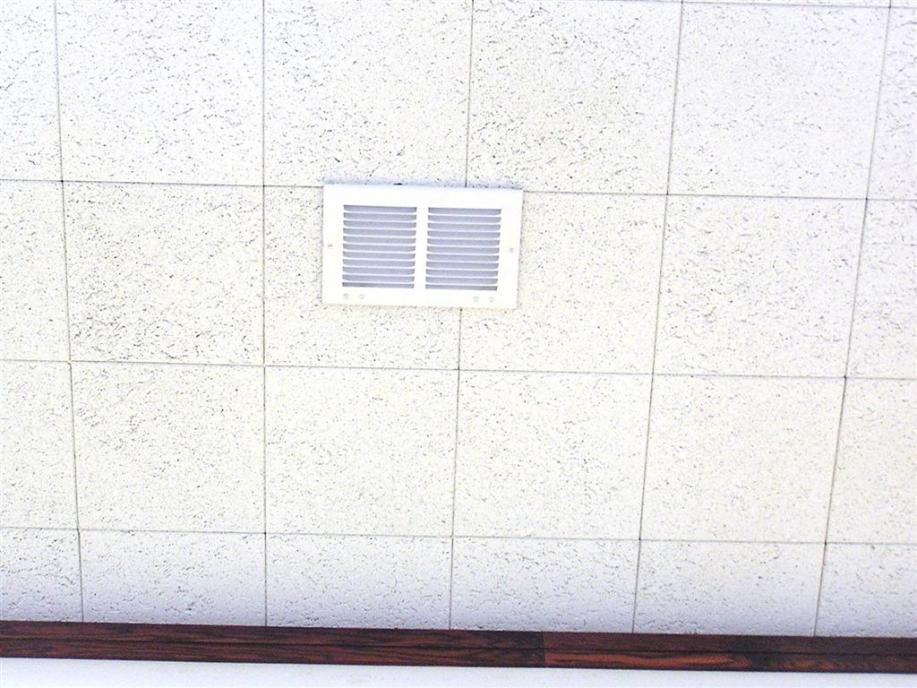
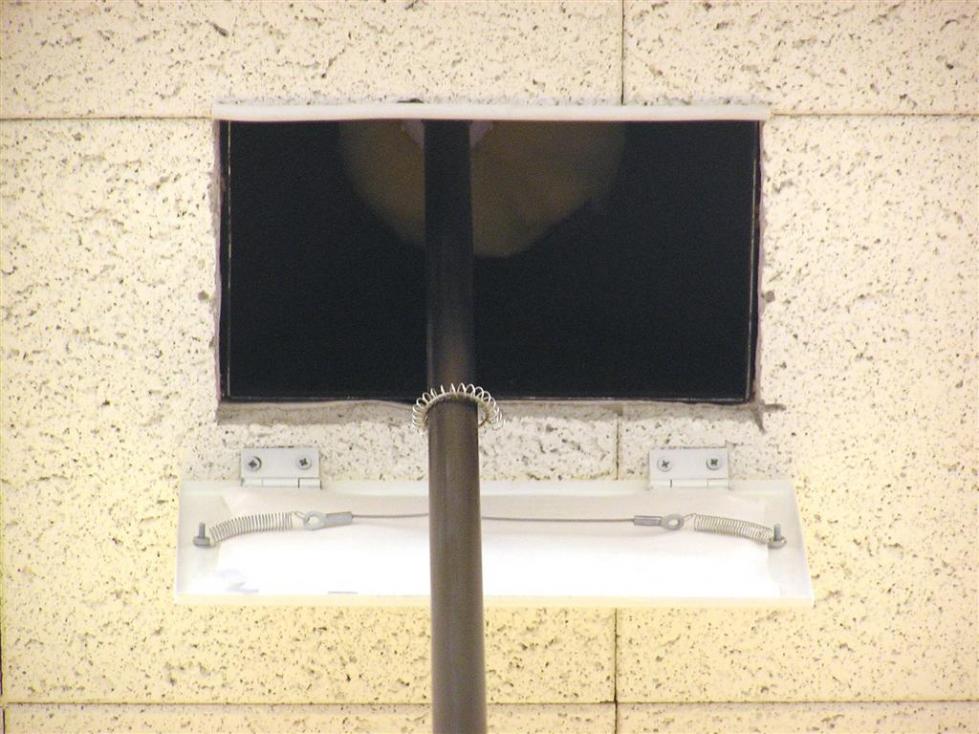
I used an straight air conditioning register boot to store the camera in the ceiling instead of the light fixture idea. The register boot was better suited for the shape of the camera and cheaper. It also was easier to conceal by using a grill to cover the hole. Thanks to Mikerowaved for his ideas for concealing the camera, which led to my own solution...using the A/C grill. When the camera retracts, a 10" x 6" air-return grill mounted on hinges is pulled into place or opened by the camera base via a cable and springs.

Limits on the garage door track control the stops.

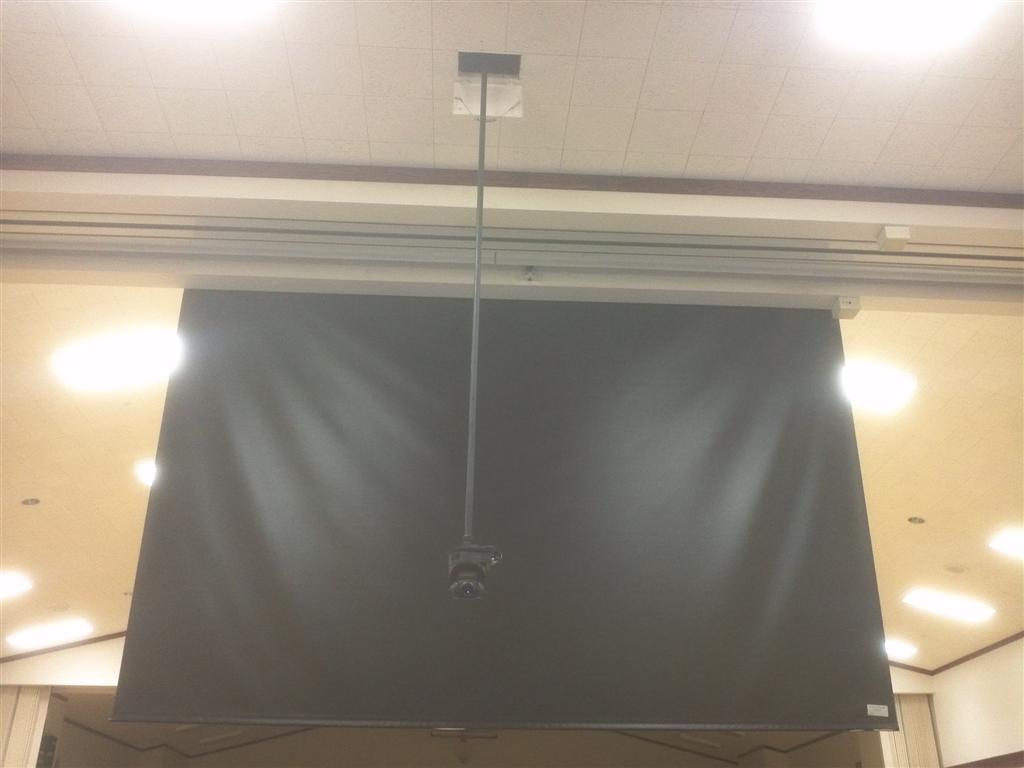
The camera drops 7' from the ceiling and suspends 8 1/2 feet off the ground.

The cost of the project was only about $375, but there was a lot of work involved.
πŸ“Ž Closed.jpg (99.2 KiB)
πŸ“Ž Door opened.jpg (96.19 KiB)
πŸ“Ž Extended.JPG (53.35 KiB)
Community Moderators
#13
Now that's pretty cool! Next time you're up in the overhead area you'll have to take some pics of the behind-the-scenes part of the installation.

Do you get much vibration or other mount movement when you tilt/pan the head?
So we can better help you, please edit your Profile to include your general location.
New Member
#14
I second the request by mikerowaved. I would love to see some shots up behind the scenes. Really great engineering job. Lots of work, but really well thought out!
Senior Member
#15
Wow, really clever!
#16

Behind the scenes pictures

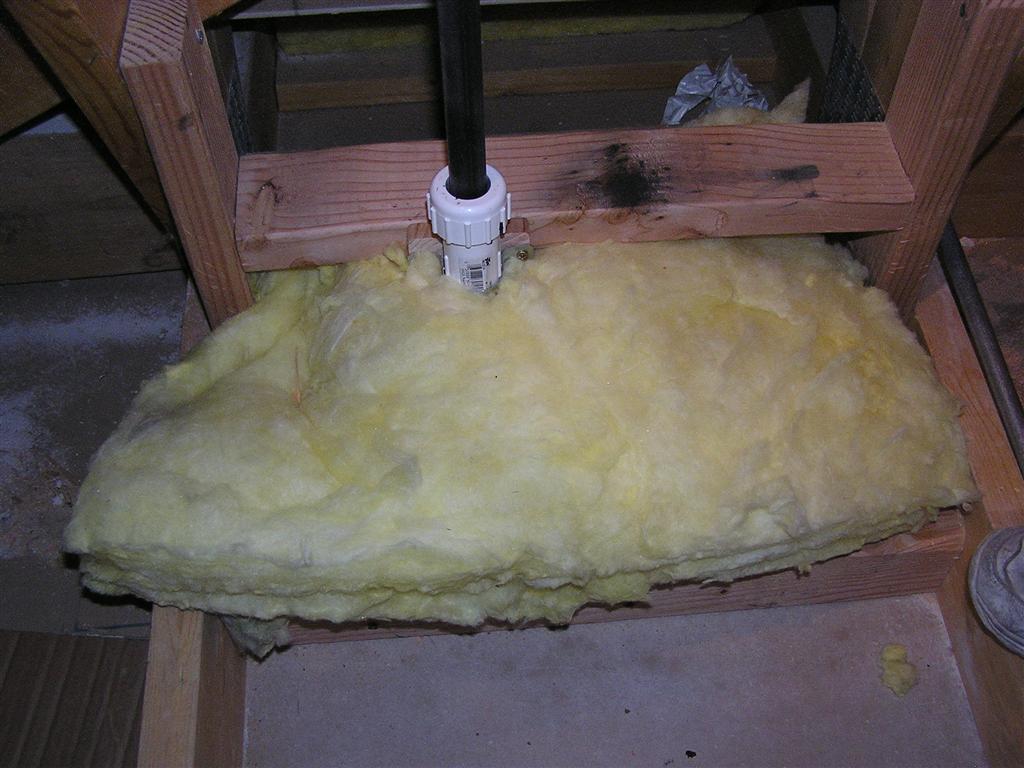
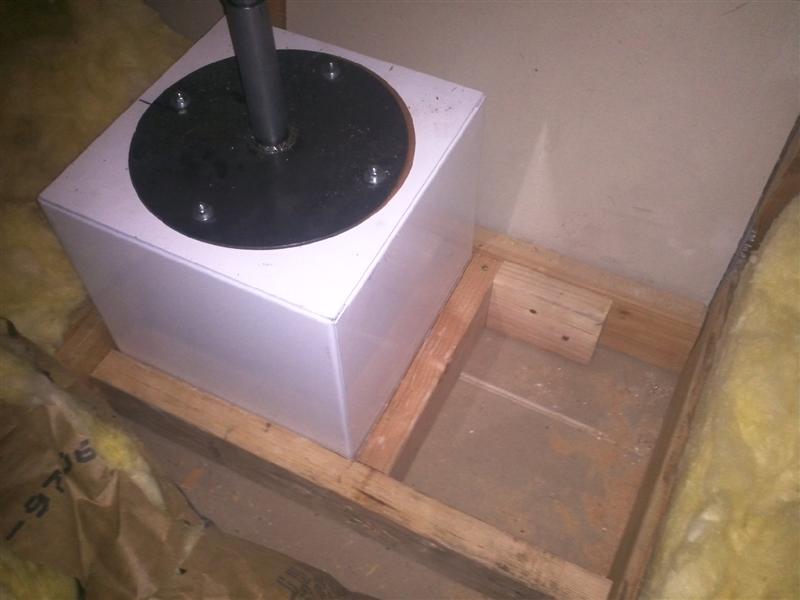
Here are some pictures of the setup in the attic.
πŸ“Ž Parts Used.jpg (88.59 KiB)
πŸ“Ž Top.JPG (67.81 KiB)
πŸ“Ž Looking Down.jpg (96.28 KiB)
πŸ“Ž Bottom-No Insulation.jpg (97.03 KiB)
πŸ“Ž Bottom With Insulation.JPG (99.59 KiB)
#17

Video of camera lowering and retracting

There were problems reported with the videos not playing. Hopefully this will correct the problem. Let me know if it does not work for you.

The trick was to check 'Rewind Movie After Playing' under the Options tab.
πŸ“Ž Camera Lowering Video.pps (244 KiB)
πŸ“Ž Camera Retracting Video.pps (218 KiB)
Church Employee
#18
Nope. The .pps files contains links to the video files, but not the actual video.
Member
#19
I had the opportunity to go and see Michael's setup this morning. This is top notch and the Val Vista Stake will be adopting some of these ideas. SPecefically the attic mounted Garage Door extended center camera.
New Member
#20
I also liked your attic mounted drop camera... A couple of questions on your engineering ... What size conduit did you use
and how did you make the transition from the conduit to holding the camera with the wires coming out. I didn't see the large
square box you used last time around.
New Member
#21
This is a great inexpensive idea. We are looking into this as well for our Stake enter. One question though, how did you get around the building code? If I'm not mistaken, you cannot install any electrical (motor or outlets) in an attic space. It presents a fire hazard. Wouldn't you need to build a fire rated enclosure around the motor and outlet?
Senior Member
#22
blmorty wrote:This is a great inexpensive idea. We are looking into this as well for our Stake enter. One question though, how did you get around the building code? If I'm not mistaken, you cannot install any electrical (motor or outlets) in an attic space. It presents a fire hazard. Wouldn't you need to build a fire rated enclosure around the motor and outlet?

I thought about the same thing and put it to our A/V specialist who takes care of our equipment. He said that having a camera drop out of the ceiling is no longer approved. It is a safety issue and maintenance cost.

So it looks like I need to find a new way of mounting the camera permanently.
New Member
#23
I talked by our FM group manager about this camera mounting method. He had 2 problems with it. 1) The design has not been approved and anything suspended could cause injury if there is a design flaw because it was not engineered correctly. 2) Once you have opened the ceiling you have penetrated the fire rating of that ceiling and this has not been approved as well.

In our stake the older buildings have no building sprinklers and no electrical motors are installed in the attic. Access to the attic is via step ladders to access doors. Once inside, there are no lights and multiple places were one have to crawl over and under the duct work. This is where I would be installing our camera.

The newer buildings in our stake have sprinklers in the building and the attic. The heating and air conditioning motors are installed in the attic. The attic spaces have lights with a built-in stairway (no ladders). Once in the attic, one can access all spaces without any crawling. It might not be against the code to install a motor in this type of attic (since there are already some there) however, there would still be the penetration of the ceiling fire rating that would have to be addressed.

I have asked the Stake President to send a request for an exemption up his channels to see if we could get architectural and engineering approval.
#24
That's great information and I hope you can find solutions.

Another stake in my area had a drop down projectors installed in their cultural hall, but the work was done by an outside contractor. The labor and retracting unit was purchased at retail price so it was very expensive.

Excessive costs to implement the retractable camera may squash your project. To keep costs down, I would suggest consulting with a building contractor in your area (stake) to overcome these issues and find out if there are any other concerns. Then submit those solutions along with your design proposal. You may be able to recruit qualified people with expertise in these areas from your stake to help and possibly donate labor/materials. Your stake president also may have some pull with the FM group, so be sure and keep him in the loop. This is a great idea and you may have to do all the legwork yourself. If you can find solutions to the objections, you should be able to go forward get this installed.
Member
#25

plenum rated equipment

Very clever, nifty and interesting. I work in an industry we commend clever and fascinating design solutions. This being said, we also have a very serious responsibility to maintain safe buildings where many hundreds of people congregate together.

As has already been conveyed in previous posts all equipment in attic spaces must be plenum rated equipment. All motors, wires, cables, and equipment must be plenum rated. The power wires, and all wires and cables that connect to the equipment and camera must also be plenum rated and all other equipment related to the install in the attic space must be plenum rated. A rated separation must be maintained to the public space. Following building codes and not going around them.

This is also a related issue for those who self install internet connections in church buildings. All cables, wires and equipment in attic spaces must be plenum rated. This would be CAT5, CAT5e, CAT6 or other twisted pair bundles and all connections, equipment, power connections, transformers, and power wires must be plenum rated. If wireless equipment is installed in the attic space it must also be plenum rated equipment, including the power connections, transformers, and power wires must be plenum rated. We have a very serious responsibility to maintain safe buildings where many hundreds of people congregate together.
Member
#26
kh_design wrote:As has already been conveyed in previous posts all equipment in attic spaces must be plenum rated equipment. All motors, wires, cables, and equipment must be plenum rated. The power wires, and all wires and cables that connect to the equipment and camera must also be plenum rated and all other equipment related to the install in the attic space must be plenum rated. A rated separation must be maintained to the public space. Following building codes and not going around them.

This is also a related issue for those who self install internet connections in church buildings. All cables, wires and equipment in attic spaces must be plenum rated. This would be CAT5, CAT5e, CAT6 or other twisted pair bundles and all connections, equipment, power connections, transformers, and power wires must be plenum rated. If wireless equipment is installed in the attic space it must also be plenum rated equipment, including the power connections, transformers, and power wires must be plenum rated. We have a very serious responsibility to maintain safe buildings where many hundreds of people congregate together.

Not quite. The cables must be plenum rated ONLY if that space is being used as a plenum (as seen at: http://en.wikipedia.org/wiki/Plenum_cable). Our stake center (where I will be pulling wire next weekend) is like the blue illustration in the above link and when I asked if plenum cable was required, I was told by FM that it was not plenum space, so plenum cable will not be required.

Aaron Z
Community Moderators
#27
In the US local building codes may vary. It is the responsibility of a builder or renovator to comply with local code. Local authority may model the National Building Code or there may be a local proprietary code. The local FM office will be aware of the local codes. Any building modifications to Church properties should be coordinated/approved by the FM office for this and other reasons.
JD Lessley
Have you tried finding your answer on the ChurchofJesusChrist.org Help Center or Tech Wiki?
Community Moderators
#28
Aczlan wrote:Not quite. The cables must be plenum rated ONLY if that space is being used as a plenum.
Local code in some areas differs. As jdlessley says, check with your FM group. In our location it is required by the city code.
New Member
#29

Mounting options

You can also mount the camera to a bracket installed on the rear of the BB Standard. This option is not always available if you have a project screen that drops down behind the BB Standard. Some of the newer buildings have the projection screens mounted in the corners of the CH. There are scissor lift devices that extend down 4 to 18 feet, but they are on the expensive side, and it's very unlikely the FM Group would agree to allowing it to be installed. But just a thought anyway.
#30
Camera mount
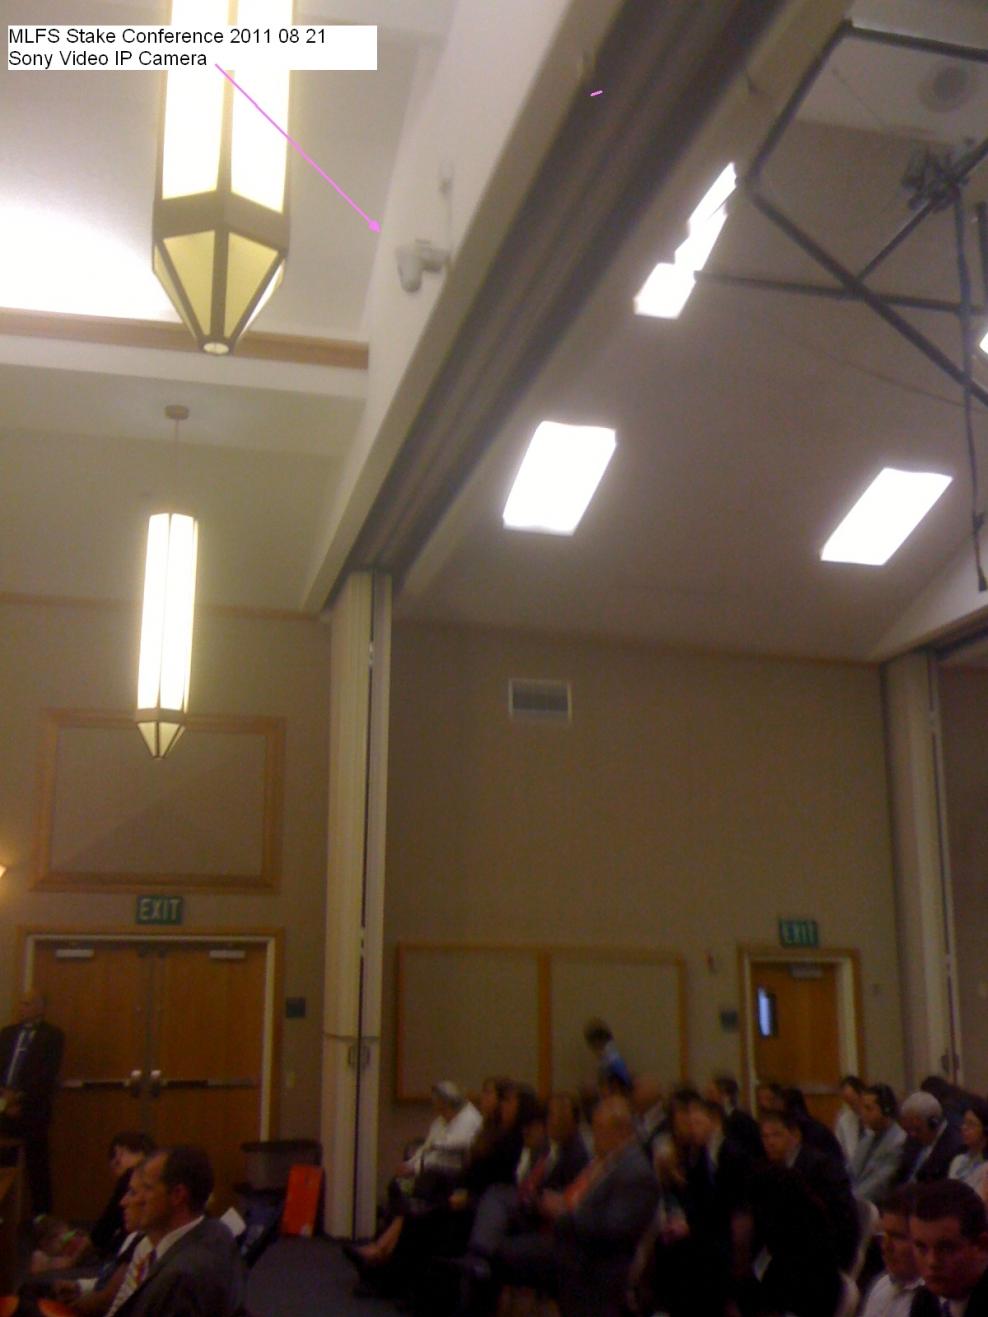
MLFS 2011 08 21 Sony Video Camera.jpg
(88.95 KiB) Downloaded 219 times
Thanks,
:cool:Your Fellow Member,
Pete Arnett
Sunny South Florida, USA
#31
michaelfish wrote:Well, here's my idea of a garage door opener implemented as a concealed, motorized retractable camera system.
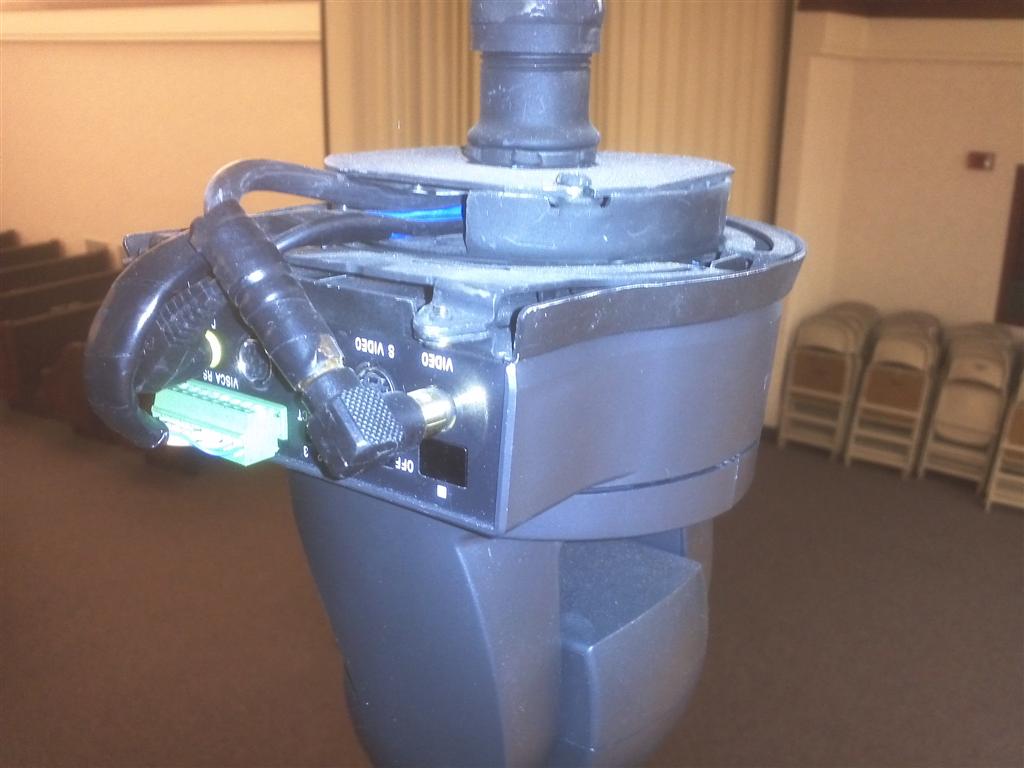
...and finally, a short video of the finished motorized retractable camera system in action. A battery operated keypad on the wall activates the system. The close-up of the camera shows the low voltage cables, 2 CAT5 cables for VISCA control and RG-6U coax for composite video. Another picture shows how the projection screen in the cultural hall hides the camera and pole from their view.

[video]http://youtu.be/joRK1VqrXuE[/video]
Keypad.jpg
(85.98 KiB) Downloaded 466 times
Screen hides camera.jpg
(72.8 KiB) Downloaded 475 times
Camera mounting.jpg
(90.9 KiB) Downloaded 473 times
Community Moderators
#32
michaelfish wrote:...and RG-6U coax for composite video.
Very nice, Michael. Just curious... why did you choose composite video instead of s-video from the camera?
So we can better help you, please edit your Profile to include your general location.
#33
Mikerowaved wrote:Very nice, Michael. Just curious... why did you choose composite video instead of s-video from the camera?
Price.

I did some testing, comparing S-Video through baluns and regular composite and could not see any difference. At the time, I was installing 3 cameras, so 6 baluns would have been necessary ($40 x 6 = $240).

In addition, our 3 video camera signals (and composite computer video) were going to be run through a quad video processor (Ultrak KQ7340CU) so that all 4 inputs could be displayed simultaneously on a 20" monitor. The quad processor was only $20 but was for composite video only.
#34
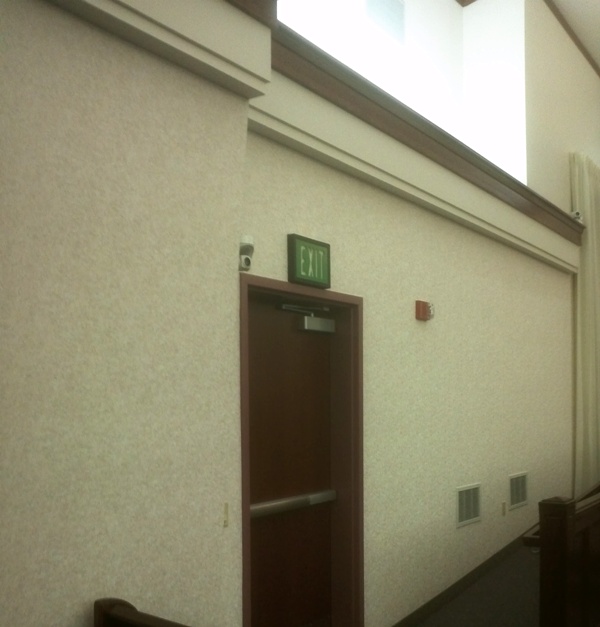
I just took a trip to another stake to evaluate their setup, in preparation to get ours installed. They installed the camera on the front curtain wall (see Photos). They then ran wires (power and video) through the mezzanine, into the Satellite cabinet. From the satellite cabinet they had a PC with software to control the camera, then they used remote desktop to control that computer from the chapel. They also had a live feed to the chapel. He said it worked great.

[video]http://youtu.be/kP0aHNxx-tE[/video]
Member
#35
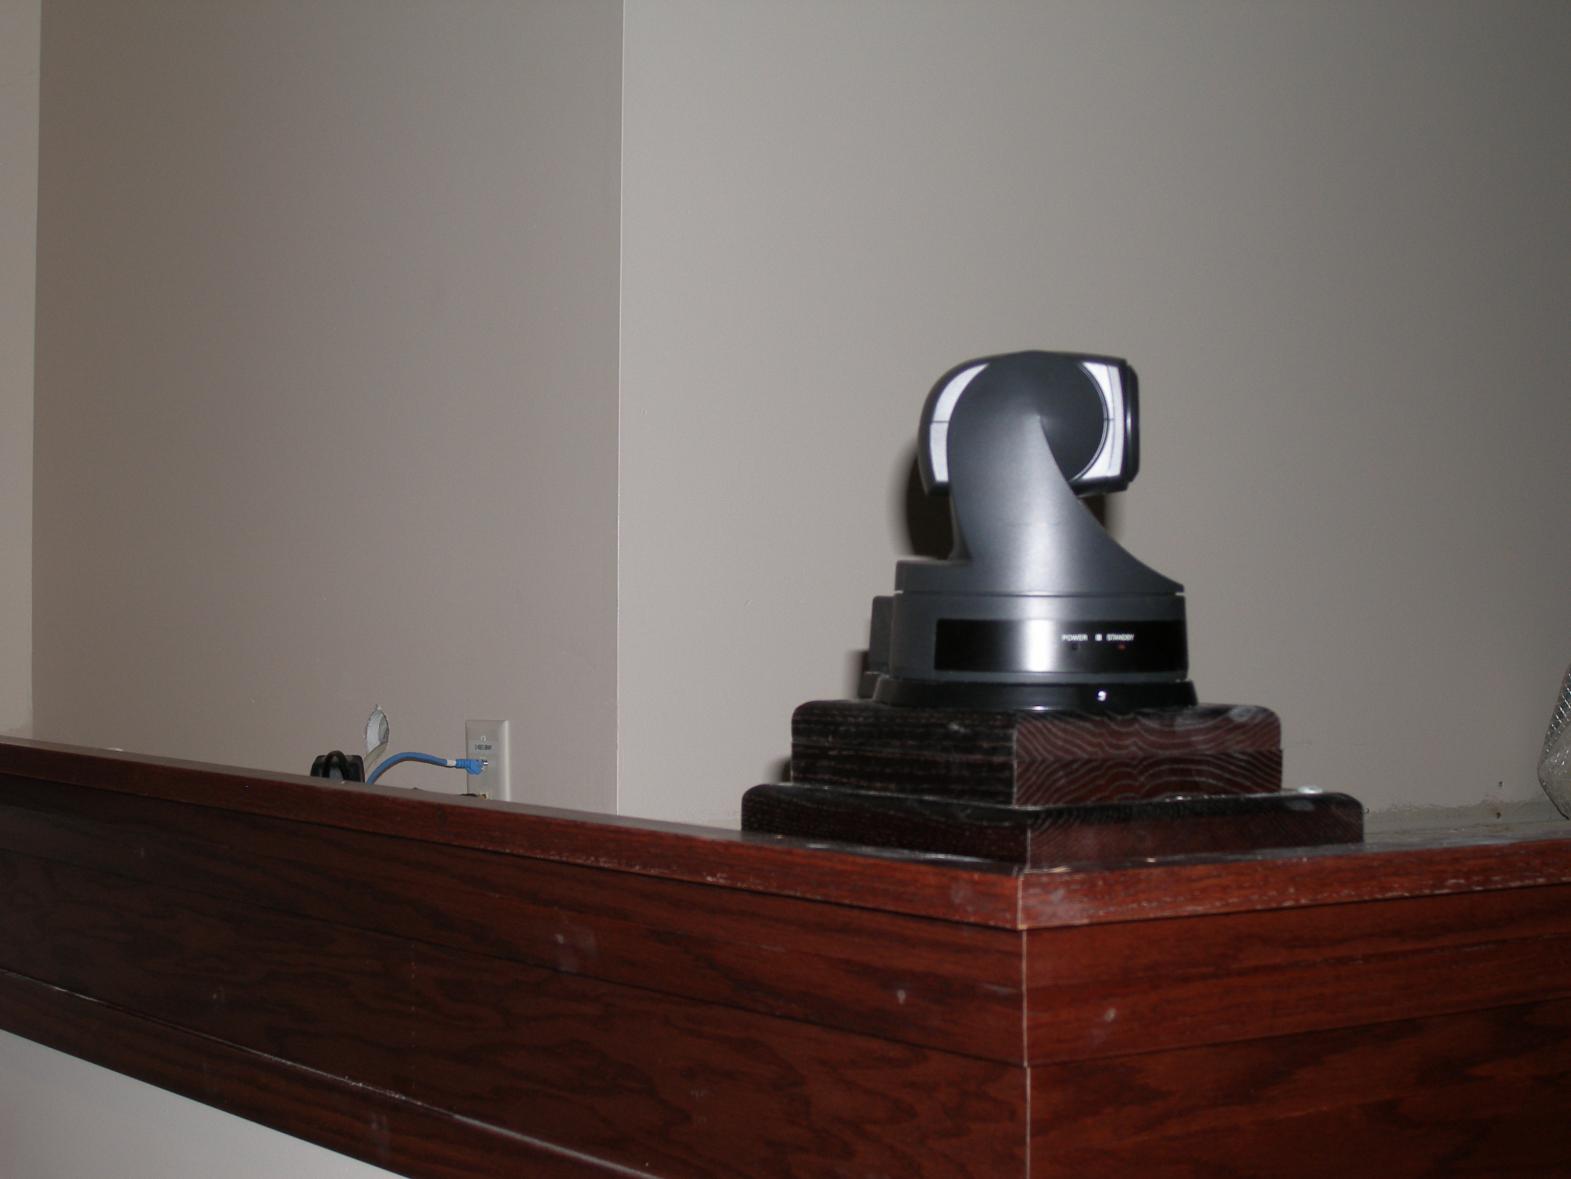
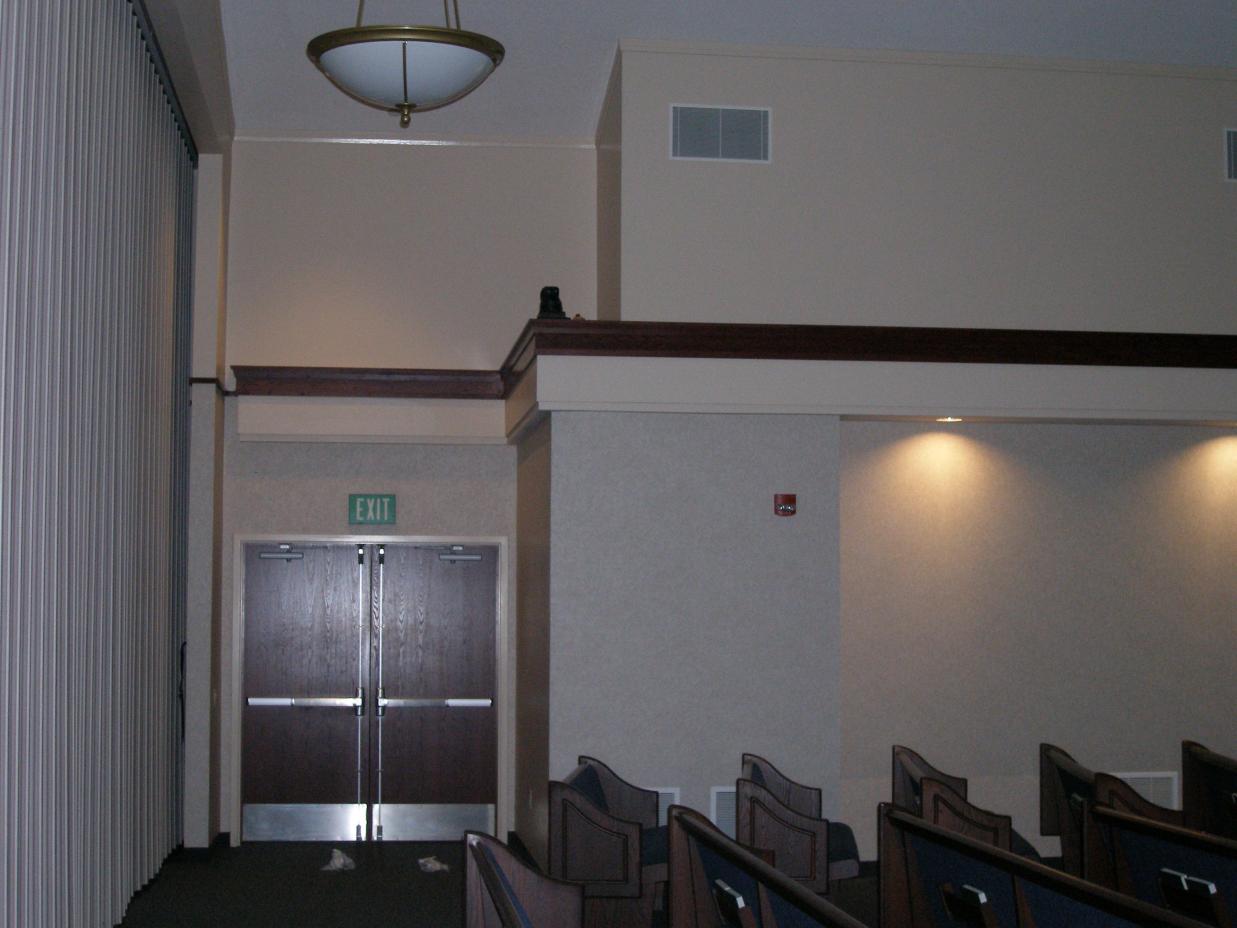
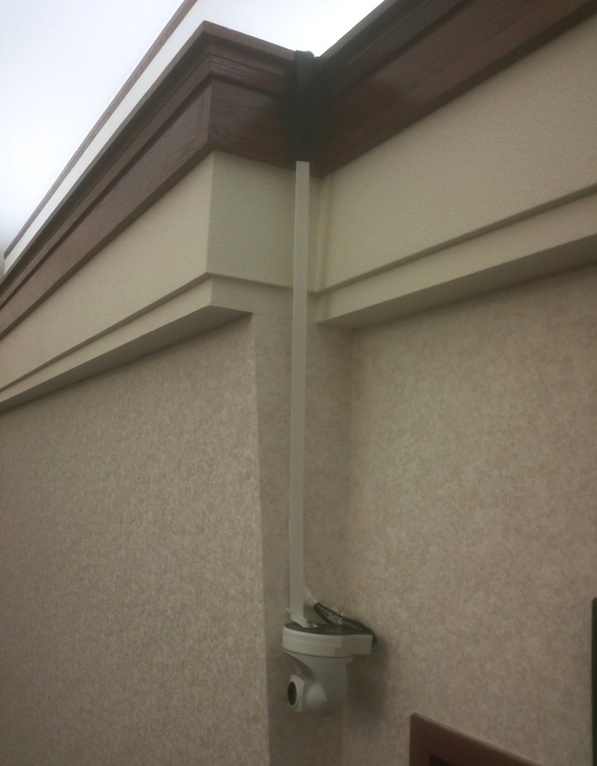
Here are some images of our setup in a Legacy design building. Placed over the 3rd clerks office.
Camera Side w-Wall.jpg
(84.61 KiB) Downloaded 339 times
Loc long.jpg
(98.45 KiB) Downloaded 346 times

I have more details if you want to see the base and cables.
Arlan Beebe
Ann Arbor Stake
Member
#36
Paulbb1 wrote:Placed over the 3rd clerks office.
Have you found that to be too high of an angle? Or does it still seem like you're naturally looking at the speaker? (I remember reading a comment on here about seeing the tops of bald heads...)

Also, at that distance, how far are you zoomed in for the pulpit?
Thanks!
Member
#37

Camera angle

We have had no complaints even though we do see bald heads. If it is an issue I could take a video and post it. Oops MH software doesn't allow saving of camers output. I'll have to find out how to use the MS encoder to do it.
Arlan Beebe
Ann Arbor Stake
Member
#38
thanks!
yeah, pics or video would be great, but please don't inconvenience yourself. I've been trying to put together the pictures I've seen here of different camera locations and their respective views, all in preparation of mounting our stake's camera(s).
FYI, I think MS Expression will allow you to stream/save files locally.
New Member
#39
Paulbb1 wrote:Here are some images of our setup in a Legacy design building. Placed over the 3rd clerks office.

I have more details if you want to see the base and cables.
Paulbb1, I'd love more details, we have a legacy building, how did you get power/ video signal up there on that ledge? Did FM group put that in, or is there a jack up there standard?
#40
Paulbb1 wrote:...Placed over the 3rd clerks office.
Since the ledge may interfere with the picture, how much of the choir can you get with the camera placed the way it is before seeing the ledge?
Member
#41
michaelfish wrote:Since the ledge may interfere with the picture, how much of the choir can you get with the camera placed the way it is before seeing the ledge?
We moved the top wood block over the edge of the ledge to get the far left of the choir seats so we could see the open area where musicians played instruments. We get the whole choir and then some. Yet, we can zoom in on just the director's head and shoulders. I guess I will include a full swing of the camera zoomed back and forward.

The computer we use is not dedicated to webcasting and is used as the desk computer in the FHC. So it takes an nearly and hour to setup and get running. Spring is here and the yard keeps calling me and I succumb.
Arlan Beebe
Ann Arbor Stake
Member
#42

Installation images

nognielsen wrote:Paulbb1, I'd love more details, we have a legacy building, how did you get power/ video signal up there on that ledge? Did FM group put that in, or is there a jack up there standard?
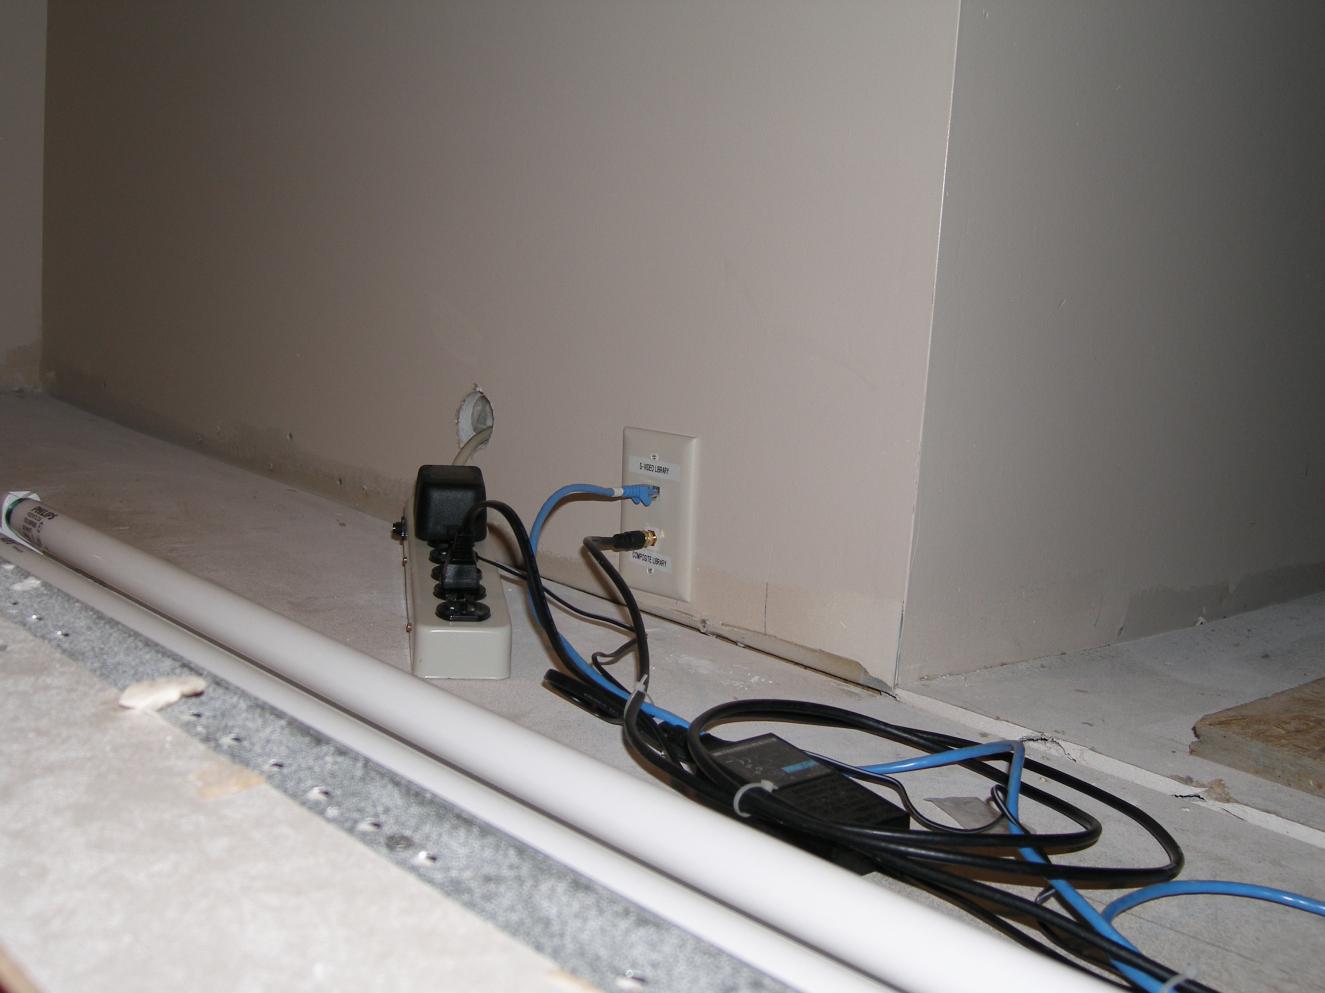
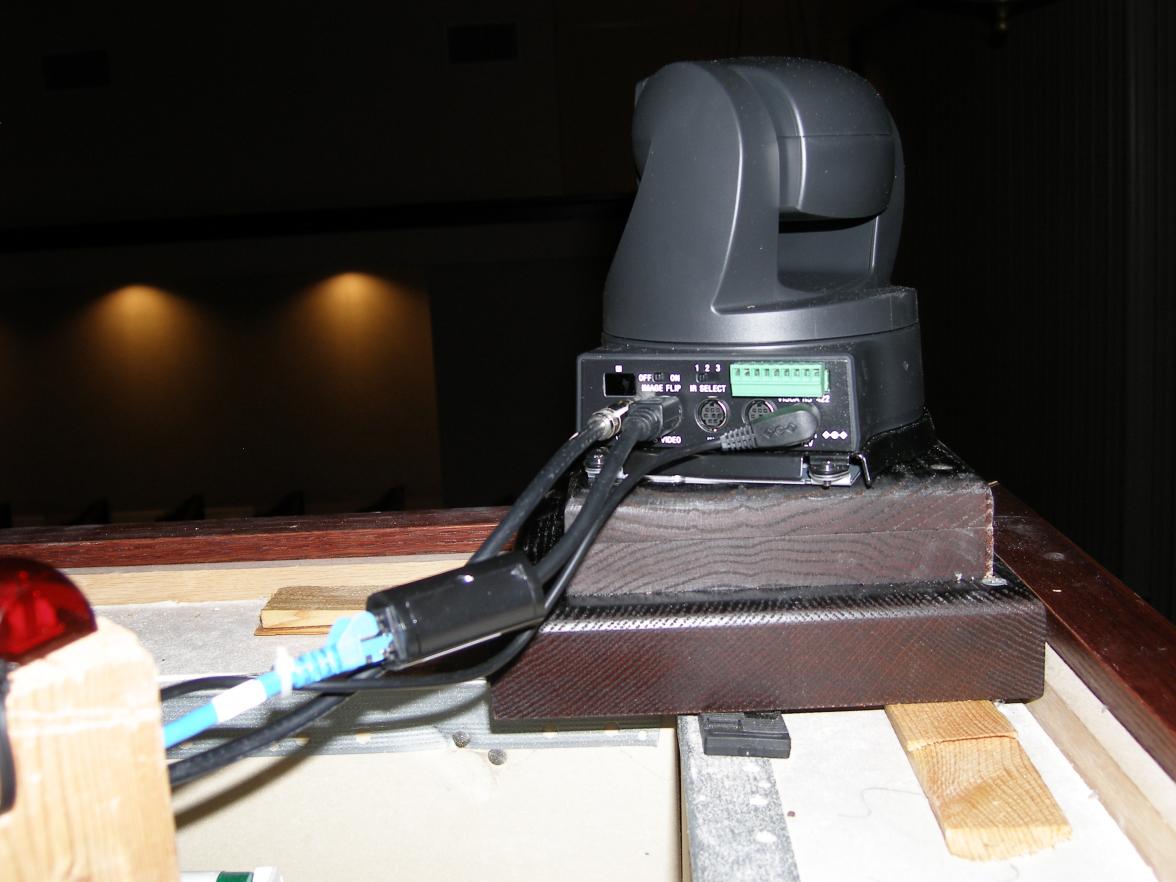
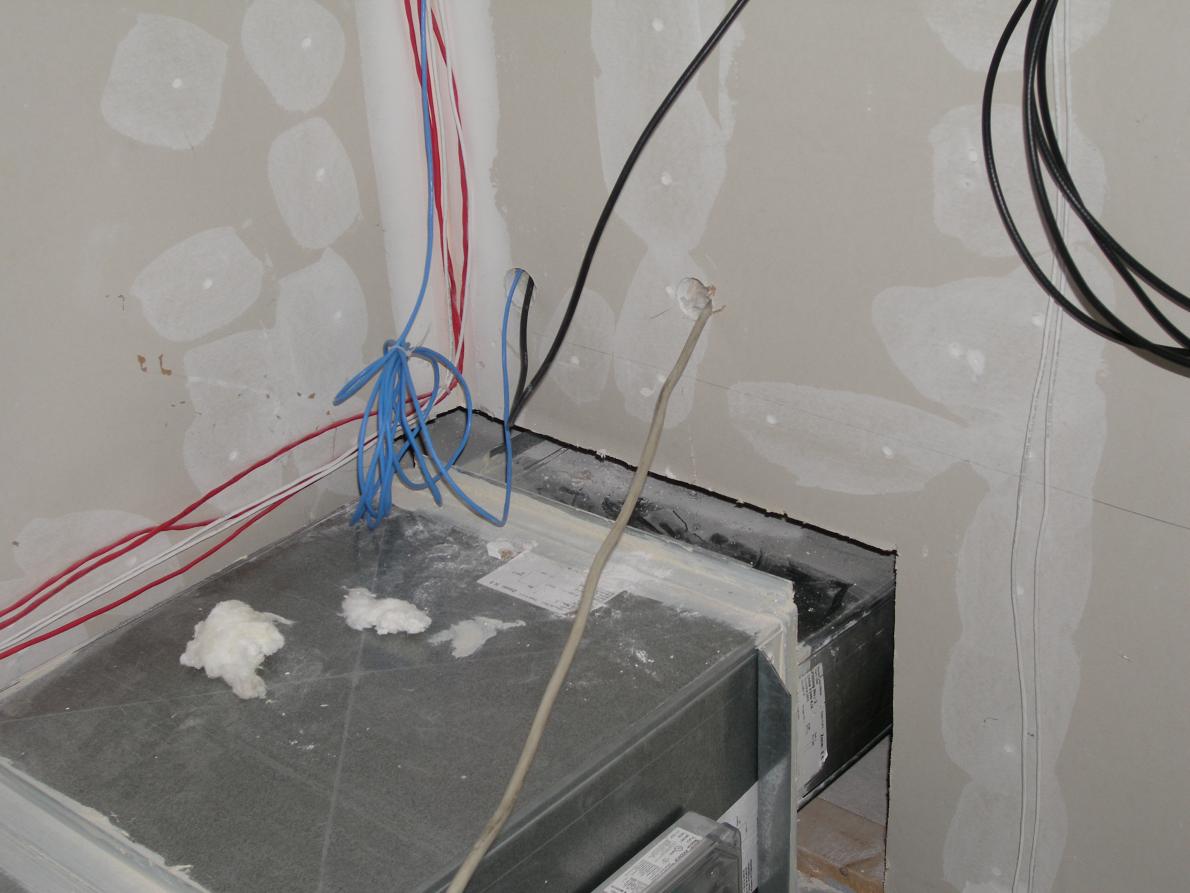
I installed it myself with help pulling cables and mounting. FM at the time didn't have the skills but they could now that I went through installing new 881 routers and access points with them.
Here are some images.
Attic Chapel Wall4.jpg
(87.86 KiB) Downloaded 513 times
Camera Bk3.jpg
(91 KiB) Downloaded 516 times
Attic Chapel wall1.jpg
(91.4 KiB) Downloaded 513 times
Camera power cord.jpg
(94.79 KiB) Downloaded 515 times
P4100022.jpg
(98.24 KiB) Downloaded 513 times
Arlan Beebe
Ann Arbor Stake
#43
I was wondering how you ran control to the camera. Then after looking more closely, it appears you have an IR emitter pointed to the IR sensor on the rear of the camera. Is this correct? How did you extend the IR signal (what device and cost)?
Member
#44

IR emitter not used

michaelfish wrote:I was wondering how you ran control to the camera. Then after looking more closely, it appears you have an IR emitter pointed to the IR sensor on the rear of the camera. Is this correct? How did you extend the IR signal (what device and cost)?
We tried to use the IR emitter but it only worked half way down the hall. It was a wireless that converted tp IR. Pulled a cat5e cable from camera to sat cabinet but not working yet. the RS422 to serial/USB port converter didn't work. Still looking for one that will work. There is a separate thread on the subject.

Using IR remote that came with camera. Just preset positions and give to someone that can see the monitor set in the corner of overflow area. Some training is required but is easy to use.
Arlan Beebe
Ann Arbor Stake
#45
It's a common practice to use CAT5 cable to extend the distance to IR emitters. And if the runs are more that 100' or so, we typically use more conductors (tie grn/wht to brn/wht, etc.) to send the signal farther.

Hope this helps.
Member
#46
Paulbb1 wrote:the RS422 to serial/USB port converter didn't work. Still looking for one that will work.

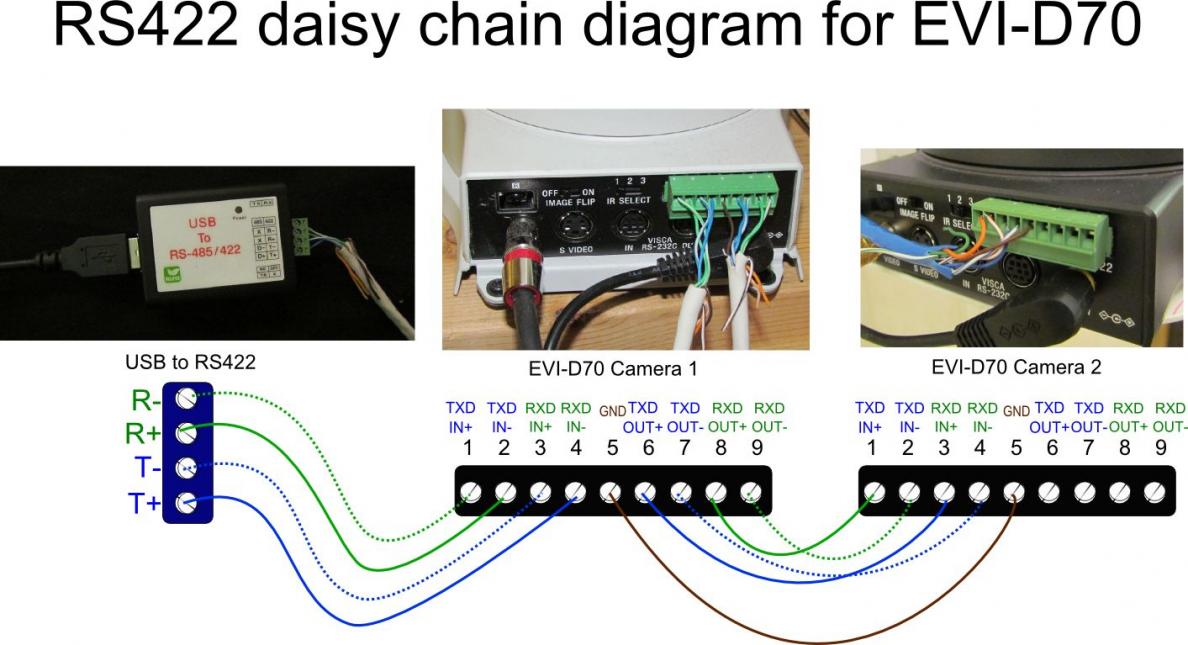
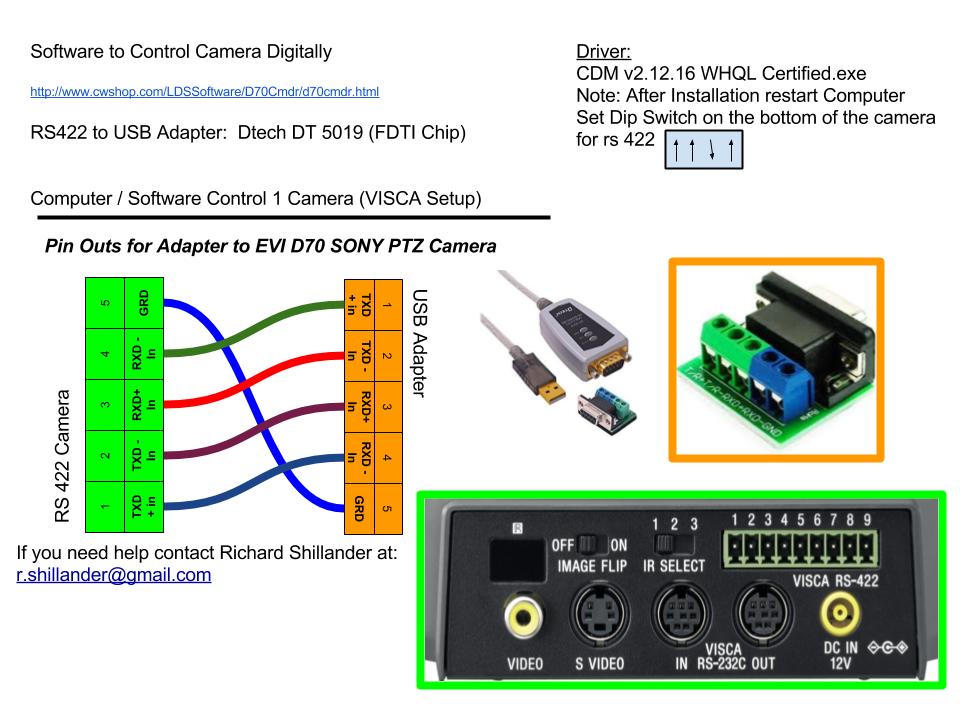
I finally figured out how to get an RS422 to USB converter to work. It took forever and was really frustrating, but it works. The long story short is that you have to wire it wrong...you can't follow the wiring diagrams/instructions that come with the converter.
RS422_Pin_Out.jpg
(98.51 KiB) Downloaded 529 times

I'm not sure who originally posted this image, but it got me going. Notice that between the converter and camera, you wire positive to negative throughout (R- to T+, R+ to T-, T- to R+, and T+ to R-). If you daisy chain cameras, you wire things the correct way (R+ to T+, R- to T- etc.). I had purchased three different converters and could not get any of them to work. Once I wired things this way, everything worked!

I highly recommend trying a program called D70 Commander that was written by a fellow forum member: http://www.cwshop.com/LDSSoftware/. It allows you to configure preset camera angles, overlay basic text, etc. I'm going to post a new thread that outlines everything I recently went through to get things working.
#47
Fantastic! I tried for weeks to get RS-422 to work with software. I tried at least 4 different adapters, cards, etc. and several software programs and never could. It was very frustrating.

Thanks for your perseverance!

Also, the wiring diagram you included is GREAT. Easy to understand how to make things work and where the wires go. I really appreciate this!
Member
#48
The real champion is lpuster who wrote the software I used and sent the wiring diagram from another thread he found!
New Member
#49
Hi, I just have one question. What is the ideal distance between the cam and pulpit. I'm afraid to mount it to far from the pulpit to get a good picture.
#50

What the EVI-D70 picture looks like at 60'

We mounted cameras at the rear of the overflow area just in front of the cultural hall.

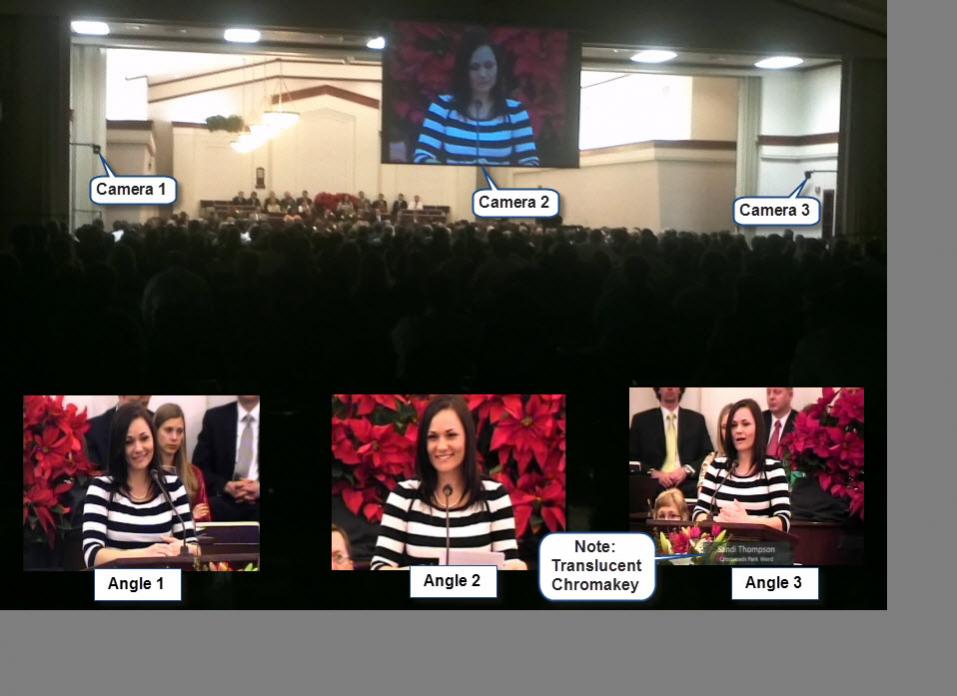
Here is a sample of what you can expect using a Sony EVI-D70 camera if mounted 60' from the pulput. The cameras on the sides are about 75' from the pulpit.

The EVI-D70 zoom ratio is 18x without digital zoom (which deteriorates the picture substancially). We have found we don't even zoom all the way in, so at 60' to 75', it still looks great!
πŸ“Ž Camera Positions.jpg (69.6 KiB)
#51
I'm looking at mounting a D70 at the rear of the chapel above the curtains (as well as one on each side). So this will be very high (no mechanism or mounting to drop it down).

For those of you who have done this, how is the picture from that angle? The angle seems like it would be pretty steep and may make for an awkward picture. Anyone have a sample they could post? michaelfish, looks like from your picture that your center camera is dropped down. Is that correct?

And for those of you who have mounted them on the sides, anything you'd do differently if you were to do it again (e.g. not symetrical on each side? closer to the front?)?
#52

Motorized, retractable EVI-D70 camera mounting system

michaelfish, looks like from your picture that your center camera is dropped down. Is that correct?
Yes, that is correct. The center camera drops out and lowers from the ceiling.

Check out this video to see how it operates: http://www.youtube.com/watch?v=joRK1Vqr ... e=youtu.be
Screen hides camera.jpg
(72.8 KiB) Downloaded 795 times
P1010045 (Large).JPG
(49.88 KiB) Downloaded 792 times

From my experience in mounting cameras at high angles, plan to see a lot of forehead - especially if they read their talks. If the speaker is bald, you may even get shiney reflections of the lights.

In addition, at certain angles members are visible behind the speaker so you may want to plan your camera angles so the background is not a seat. Perhaps positioning the camera so the organ or piano is the background may cut down on distractions behind the speaker.
New Member
#53
Guess I should have read the rest of the thread before posting :-/ Most of my questions were answered there. I would like to see the original ppt, however.
michaelfish wrote:Yes, that is correct. The center camera drops out and low

<<snip>>

From my experience in mounting cameras at high angles, plan to see a lot of forehead - especially if they read their talks. If the speaker is bald, you may even get shiney reflections of the lights.

<<snip>>
This is exactly what I have been contemplating for our stake center. We also have the camera mounted in the wall above the overflow and have found the angle to be suboptimal including the shiny reflections.

I would extremely appreciate more details on your raise/lower mechanism... trap door... cables and pulley... hydraulic... etc. Also, how do you control the pan zoom tilt on the camera? Do you use Sony's controller or a serial based app on a computer?
Mark Deason
former STS Vancouver WA North Stake
#54
I would extremely appreciate more details on your raise/lower mechanism... trap door... cables and pulley... hydraulic... etc. Also, how do you control the pan zoom tilt on the camera? Do you use Sony's controller or a serial based app on a computer?
Using a garage door opener in the attic mounted vertically instead of horizontally, I was able to implement a motorized retractable camera mount for the Sony EVI-D70.

The camera is raised/lowered by a 3/4" EMT conduit mounted to the scew drive trolley. It is actuated either via wired button control or from a wireless keypad mounted on the wall. Pan/Tilt/Zoom is accomplished via a Sony RM-B300 joystick controller located in the media center.

I used an straight air conditioning register boot installed in the ceiling to store the camera when not in use. The camera retracts into the boot and a 10" x 6" A/C grill mounted on hinges is pulled into place or opened by the camera base via a cable and springs.

Limits on the garage door track control the stops.

The camera drops 7' from the ceiling and suspends 8 1/2 feet off the ground.

The cost of the project was about $375, but there was a lot of work involved.
#55

Just hang it!

An option to get the camera closer and place it about eye level could be to hang the camera in the chapel from the soffit. The tuck at the front of our Legacy style stake center is great for concealing most of the camera from the congregation's view.

I did this by using a 1" steel bar and bent it at the right places so that it simply hangs from the soffit. The steel was painted and wires taped behind so everything is nicely concealed (white tape).

Since the camera about 7' off the ground, there is no problem with shiny-heads-reflecting-lights. In addition, the camera is close enough so smooth slow pans of the choir are possible. We also get great close-ups of hands playing the piano keys when they play the introduction or for solos. The camera is only used for supplimental views since it can only show the speaker from the side.
If you are on the stand, this is what you see
Chapel wide.jpg (68.44 KiB) Viewed 6098 times
Chapel cu.jpg
Easy to remove and rehang
(111.43 KiB) Downloaded 740 times
The attachment Chapel rear.jpg is no longer available
πŸ“Ž Chapel rear.jpg (97.88 KiB)
#56
We also mounted the camera at the bottom of the curtain wall, and attached is an example of how it views.
πŸ“Ž camera angle.jpg (27.62 KiB)
#57

Hidden Motorized Retractable Camera Mounting System

I went by the AZ Gilbert Highland Stake last night (Higley and Greenfield) and what they did blew me away. They had said they wanted to install a motorized retractable drop-down camera like what I had done. However, instead of a doing a pretty good job like my installation, the installer did a FANTASTIC job. Just look at the pictures…
Closed and concealed
IMG_20130507_211536 (Medium).jpg (44.76 KiB) Viewed 5858 times
Chain Closes Door Cover
IMG_20130507_211449 (Medium).jpg (30.86 KiB) Viewed 5858 times
Actuated by Wireless Remote
IMG_20130507_211304 (Medium).jpg (26.86 KiB) Viewed 5858 times
IMG_20130507_210812 (Medium).jpg
Fireproof Box Complies with Building Codes
(62.97 KiB) Downloaded 500 times
The installer even went so far as to research fire codes, create plans, fabricate the camera mount and base, install plywood floor in the attic as well as a ladder, lights in the attic and a light switch.

…and the total cost was less than $150.00 (for the garage door opener. The labor, fireproof box and mounting hardware was all donated.)

You should see it!
New Member
#58
I received this email from Brother Slaugh and it is a great extension to this thread. This is a great STS project and a real improvement in the remote viewing experience of our members and investigators. Brother Sierakowski, Area Technology Specialist - San Antonio Area
------------------------------------------------------------------------------------------------------
Hello Brothers. I wanted to share with you the completed results of our camera installations. Brother Katherman and I took our pictures and put them in a presentation and then made some YouTube videos of us walking through the installation. There is a long version (about 35 minutes) and a short version (about 6 minutes). We tell the story of how we did it and hopefully pass on some lessons learned to others who may do something like this.

Here are some links to the video.

Extended Version (35 Minutes): https://youtu.be/DCMlXOHqSz8
Short Version (6 Minutes): https://youtu.be/gH4v-oKqwHw
Photos: http://bit.ly/1F10DP1
New Member
#59
Great job, guys! Very nice video and pictures. I really like your custom metal enclosure and door, and the permanent lighting in the space. We did this in our stake (Vancouver Washington East) just about two years ago, generally following Michael Fish's design. Here are some things we did (and would like to have done) just a bit different:

1. We mounted the garage door opener upside down, with the power head at the bottom simply sitting on a framed platform. This allowed for much easier positional adjustment.
2. We ran a separate switched circuit for the camera (we also have a projector mounted in the same space).
3. We oriented the camera with the home position facing the pulpit, as you did. If we did it again, we would probably turn the camera home position 90 degrees, which would allow us to pan the camera to the back of the cultural hall in addition to the pulpit.
4. We hang pin spots from the cove light shelves that effectively makes the choir disappear when we drop the lights in the chapel. While the speakers initially don't like it because they can't see the audience, they usually see the value when we show them the picture zoomed on the speaker with bouncing primary choir knees in the background. We also have cameras mounted on these hangers that provide a different angle, including parts of the audience.

Here is a link https://plus.google.com/+MarkDeason/posts/YvYjUCxEsgq to my pictures (including some other stuff we've done in the attic).
Mark Deason
former STS Vancouver WA North Stake
Community Administrator
#60
msd360 wrote:4. We hang pin spots from the cove light shelves that effectively makes the choir disappear when we drop the lights in the chapel.
Are the lights on dimmers? I'd think switching them off would be distracting. If they're on dimmers, is that normal or was that added?
Have you searched the Help Center? Try doing a Google search and adding "site:churchofjesuschrist.org/help" to the search criteria.

So we can better help you, please edit your Profile to include your general location.
#61
3. We oriented the camera with the home position facing the pulpit, as you did. If we did it again, we would probably turn the camera home position 90 degrees, which would allow us to pan the camera to the back of the cultural hall in addition to the pulpit.
It shouldn't be too hard to remount your camera and re-position the base 90 degrees.

If found the orientation of the camera isn't that critical. I was sure to mount our camera so that I could swing it around to view the cultural hall, but in practice with the lights off in the back for the projector, when the camera is swung to view the cultural hall, everything is dark except for the bright light from the projector - so the picture isn't worth taking...
New Member
#62

Re: Sony EVI-D70 RS 422 - Controller
Here is a basic diagram of how to get it all working with the RS 422 interface, which gives you unlimited distance for the controller from a computer! :D